How I wrote my book
Earlier this month I released a book about AWS Lambda and Go.
I thoroughly enjoyed working on it, and I learned a lot throughout the process. If you’ve ever thought about writing a book, I would definitely recommend giving it a shot!
When I started the project, though, I had a lot of questions about how to put a book together.
In this post I’ll share how I ended up doing it, and some of the things I learned in the process.
At the end I’ve also included a link to a repo containing a skeleton book project. You can use that to get started quickly on a writing project of your own, with all the same settings and customisations that I used.
Where to start
The biggest questions I had at first were about which tools I should use to write the book.
There seemed to be several ways to approach it, from lightweight markup languages like Markdown, to dedicated book-writing apps like Scrivener. Some people prefer to do the whole thing in Word or Pages.
And once you’ve picked a tool to write with, there are more questions about how to make it do everything your book needs. You’ll probably want to generate e-book formats like EPUB, build a table of contents and index, add a cover image, and so on. If it’s a book about programming you’ll want to include nicely formatted snippets of code, and you might also need diagrams and photos.
With all the choices it can be hard to decide the best way to get started.
Goals
The bulk of my working time is spent writing code, and I wanted the book-writing process to feel similar to that workflow. I also wanted to have some control over how the book looked, but without having to design everything from scratch.
My goals were that the project should:
- …happen in my usual text editor. For me, these days, that’s Visual Studio Code with a Vim extension. Writing in the same editor that I use for coding means I can take advantage of all the muscle memory that I’ve built up over the years, and it saves me from having to learn a new application.
- …be easy to track in version control. Like most folks, I keep everything in Git repositories. For this to work well with the book, it essentially means I want to write in a plaintext markup language, rather than using something like Word or Pages, so that I have readable diffs.
- …support all the book elements I needed. Books have lots of parts, and some of them can be complicated to format and lay out. Things like sidebars, footnotes, and tables of contents needed to be easy to do. If they were hard work, it would end up being a distraction from the work of writing.
- …generate EPUB and PDF versions of the book. I wanted an EPUB for reading in things like Apple Books. But source code examples don’t always format the best in EPUB, so it’s important to have a PDF as well, where you have a bit more control over the result.
- …look “nice”. This one is quite subjective, but I wanted to have some control over the fonts, spacing, and so on, so that I could make the book look the way I liked. I’m certainly no designer, but I find this part of the process enjoyable so I wanted to give it a shot.
Ultimately this meant finding a markup language to write in, with a toolchain that could handle all the book formatting, and which had some ability to customise the output.
Writing in AsciiDoc
I initially thought I would write the book in Markdown. It’s simple, and I’m used to using it in lots of other places, so it means not having to learn a new markup language.
But when writing a book, pretty soon you run into things that Markdown doesn’t natively know how to do, and so you have to either look for extra tooling to fill in the gaps, or build support for those things yourself. There are open source projects that address some of this, but I didn’t see anything that would do everything I needed.
At the end of the day, Markdown’s biggest strength — simplicity — is also its limitation.
To be honest, building a Markdown-based book processor with support for all the things I’d need sounded like a really fun project and I considered going that route. But I had to admit it was also a bit of a distraction from writing the book itself 😈😇
The other markup language I looked at was AsciiDoc. AsciiDoc is more fully-featured than Markdown, and, coupled with the excellent Asciidoctor toolchain, has pretty much everything you need to produce a book. (More on that below.)
The AsciiDoc format natively knows about all the common styles and elements, including sidebars, section types like chapters and parts, cross references, and so on. And the Asciidoctor toolchain gives you a lot of control over how the book is assembled — you can import files into each other, control chapter numbering, generate an index, and generally do all the work of turning a series of content blocks into a complete book.
Setting up a project with Asciidoctor
AsciiDoctor has some great documentation. But even with that, figuring out how to specify the book settings I needed, and how to structure a project around it, was the part that took me longest.
The file structure of my project ended up looking something like this:
GemfileGemfile.lockmain.adocchapters/introduction.adocgetting-started.adocanother-chapter.adoc...images/cover.svg...theme/custom-theme.yml...
A few notes on this structure:
Asciidoctor is Ruby-based, so I used Bundler to install it. That’s where the
GemfileandGemfile.lockcome from. Using Bundler, rather than installing it globally, means it’s easy to install and upgrade the dependencies and I don’t have to worry about multiple book projects trampling on each other’s versions.In addition to Asciidoctor itself, the dependences include
asciidoctor-epub3andasciidoctor-pdfto make it easier to generate EPUBs and (wait for it) PDFs, as well asrougefor syntax highlighting.main.adocis the starting point for the book. It has the document metadata (title, author and so on) and the main directives used to set up the format of the book. It also hasincludestatements that pull in the rest of the book content from the files in thechaptersfolder.The
imagesfolder has the book’s cover image, as well as the images used throughout the rest of the book, like illustrations.And
themehas my custom theme files. There’s a YAML file with the theme settings, as well as additional assets like fonts.
The end result isn’t that complicated, but there are a few things that can trip you up.
For example, you’ll need to define some settings in the document header at the start of your main document. This document header can’t contain blank lines, because the first blank line is what marks the end of the header. If you forget that (as I did a couple of times) it’s easy to do a bit of well-meaning tidying that ends up breaking your book build in a confusing way.
Similarly, when including one file into another, the toolchain injects the content without adding any separating line breaks. This means it’s easy to accidentally smoosh together the end of one file with the start of another, in a way that breaks its syntax. A simple solution is to leave a blank line between each include statement. Which is easy to do, but, again, also easy to forget.
The other thing that took a while was learning which directives to use to achieve a particular result.
For example, you might want to have numbered chapters throughout the book, but also a few non-numbered chapters at the start, like an introduction or dedication. I expected the way to do that would be through some sort of “no numbering” attribute I would attach to each of those initial chapters.
But it turns out the way to do it is to use directives to turn the numbering on and off.
So you can turn numbering off, include your initial chapters, then turning numbering back on and include the rest.
It works great, it just wasn’t what I was expecting.
Writing one sentence per line
This is the one non-technical tip, but I found it really helpful.
Since markup languages like AsciiDoc don’t care where you put your line breaks, you’re free to put them wherever you want. What I’ve started doing, and would recommend, is writing each sentence as its own line, with a line break between each.
In other words, you lay out your text like this:
This is the first sentence in the paragraph.This is the next.And this is the last.And now here we go with another paragraph...
By writing each sentence as its own line, you get a few nice benefits. For one thing, commits and PRs tend to be easier to read.
If you wrap your text on sentence boundaries, then only the sentences you actually change will be part of the diff. Whereas, if you wrap your text in some other way, you’ll often find that edits make neighbouring sentences move around. When your diffs include those neighbouring sentences, it makes the content changes harder to see.
Writing one sentence per line can also make some editing a bit quicker.
I often found myself rewriting sentences after reading back what I’d written, and replacing a line is a nice quick operation.
(I use Vim mode, so I can just hit cc on a line and then type its replacement.)
Lastly, I found it helpful to be able to see at a glance how long the sentences were. I have a tendency to write overly long sentences, and then when editing I have to chop them up to make them more readable. Having one sentence on each line means that long sentences are a bit easier to spot, so I can catch myself when I’m getting too long-winded 😴
Using a Makefile (or similar) to automate the build
I found myself building the book files quite often while working on it. Just like with a software project, you’ll find yourself in a feedback loop where you make changes for a while and then want to build the project to see the results.
So, as with a software project, building it should be a single command so that it’s quick and easy to do.
I used a Makefile to build the EPUB & PDF files, so I could just type make to see the changes.
But of course you could use Rake, or a shell script, or whatever your preferred tool is.
Editor plugins and settings
I used Visual Studio Code to work on the book (having given up the Vim Configuration Fight a couple of years ago), and I found a few plugins and settings that were helpful:
The AsciiDoc plugin adds syntax highlighting, and a live preview (although I never really used the preview).
Spell Right worked quite well for spell checking while I was writing. Adding a workspace dictionary file is also a good way to add terms that come up in the book that you might not always want in your global dictionary.
I often used Zen mode while writing, to minimise distractions.
I also discovered I enjoyed writing in a large, proportional font, rather than the small fixed width font I used for writing code (although I’m not sure why). I also wanted long lines of text to wrap while I was writing them. So I made these changes just for
.adocfiles in my workspace settings:json"[asciidoc]": {"editor.fontSize": 18,"editor.fontFamily": "Avenir Next","editor.wordWrap": "on"}
Creating a custom theme
The easiest way to customise the look of the book is to create a custom Asciidoctor theme which extends the default theme.
That allows you to change specific settings, but fall back to the defaults everywhere else.
Asciidoctor’s default theme is already quite nice, so there wasn’t a lot that I needed to change.
I used a custom theme primarily to set fonts, and to adjust spacing around some elements (like giving the chapter headings a lot more empty space, and increasing the line height for readability).
It’s easy to take TTF fonts from something like Google Fonts, and use them in your custom theme. However there are a couple of things to bear in mind when doing so.
You’ll need to make sure any fonts you use contain all the required glyphs. One common missing one is the narrow space glyph that is used either side of a dash; if your font doesn’t have this, you’ll get ugly missing glyph markers where the spaces should be.
You can solve this by editing the font yourself and creating the missing glyphs; or just try using another font that already contains them.
The second thing I’d suggest when using custom fonts is to try them out early on in your project. You’re going to spend a lot of time looking at the book while you work on it, and this is a good chance for you to see how well the font works for you over time.
I initially used Racing Sans One for my headings, because I thought it looked a bit retro and fun. But after a few days I really tired of seeing at it, and I figured that anyone reading the book would probably feel the same way.
Whenever you put a book out into the world, you’re essentially asking your readers to spend hours looking at this thing you’ve made. So it seems only decent to do whatever you can to make that experience as pleasant as possible. A lot of that comes down the writing itself, of course, but I think the aesthetics also play a big part.
Syntax highlighting
Asciidoctor supports a few different syntax highlighters. I used Rouge, which worked pretty well.
If you want to customise the theme, you can define the colours in a Ruby class, which you then import and select when building the book. If you just want to tweak an existing theme a bit you can copy its class from the Rouge source and make your changes to that. That’s what I ended up doing with mine.
I opted to use a dark theme for the code snippets in the PDF version of the book. Since most people I know use a dark theme when writing code (myself included), it seemed like a good idea to have a similar look in the book.
However a dark theme doesn’t work well for the EPUB version. With EPUB you don’t have very much control over the colours on the page, since the reader app will respect each user’s preferences (just as it should). As a result of this, complicated themes tend to render differently, or not at all, since many of the colours in the theme will be ignored.
For the EPUB I had much better luck with a simple, light theme (I went with the github theme).
So I ended up setting that light theme in the book settings, but overriding it with the dark theme when building the PDF.
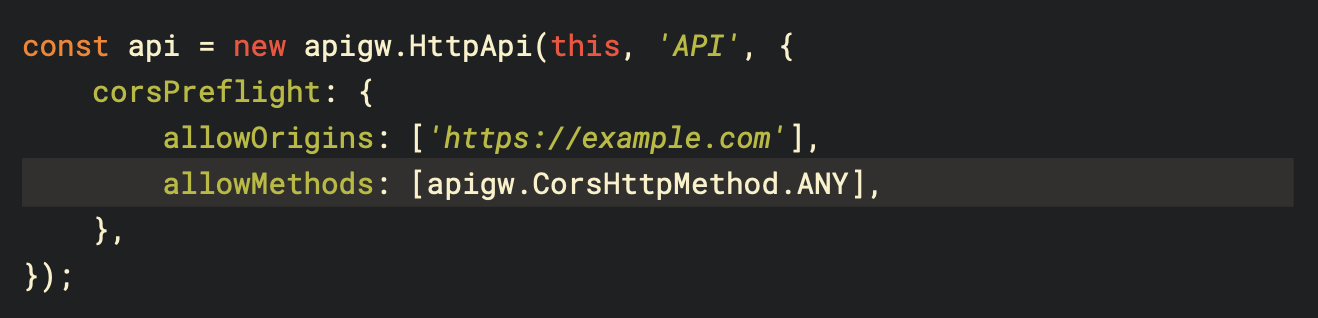
One handy feature when including code samples in the book is the ability to mark particular lines of interest so they stand out from the others. (It’s somewhat confusingly named: “highlight” in this sense means emphasising specific lines; as opposed to “syntax highlighting”, adding colours to code elements according to their types).
You can highlight lines by adding a highlight attribute on the source block.
For example, to highlight the 4th line in this snippet of TypeScript code, you could add a highlight=4:
asciidoc[source,typescript,highlight=4]----const api = new apigw.HttpApi(this, 'API', {corsPreflight: {allowOrigins: ['https://example.com'],allowMethods: [apigw.CorsHttpMethod.ANY],},});----
By default, highlighted lines have a yellow background. That colour doesn’t come from your syntax highlighting theme, but rather from Asciidoctor itself. If you want to change the highlighted background colour you can specify it in your Asciidoctor custom theme:
yamlcode:highlight-background-color: #32302f
With the theme I used, the end result looks like this:
Summary
Overall, Asciidoctor turned out to be a straightforward way of putting together a book, and I’m quite happy with the end result. I’m planning to use the same setup for my next project.
I did go through a lot of tweaking and experimenting at the start of the project to figure out how to make it do what I wanted. But once I got over that hump it’s been quite easy to use, and generally stayed out of my way while I focused on creating the content.
I’ve put together a small repo with all the files you’d need to start a book project in this way, including the theme and settings that I used for my book. If you’d like to get started on a writing project of your own, feel free to take that repo as a starting point, or just pick out the parts you find useful.
You can get the repo at https://github.com/kevinmcconnell/book-skeleton.
Lastly, if you found this post interesting, you can follow me on Twitter where I’ll be posting some more on the topic!
Posted November 30, 2021.